|
|
|
|
|
|
|
|||||||
|
|||||||
|
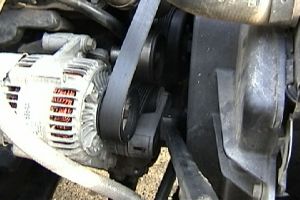
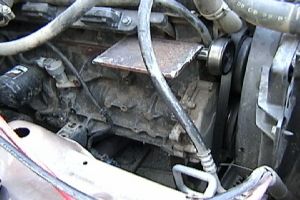
I have an ARB air compressor, and after a trail run I not only fill my tires, but since, I at least have a compressor, I also get to fill other peoples tires. The ARB compressor I have takes about seven minutes per tire to go from 11 P.S. I to 30 P.S.I., which means after a club run I spend a lot of time filling tires. I decided that I needed a belt driven air compressor! |
|
|
||||||||||||||||||||||||||||||||||||||||||||||||||||
|
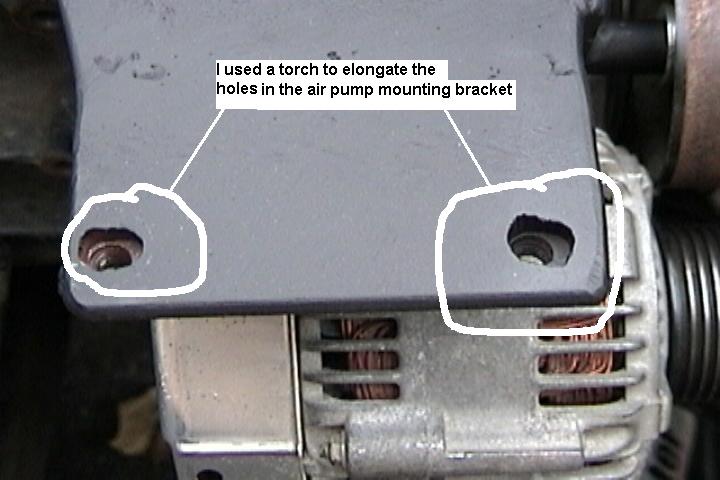
Boy was I wrong.... Not only were some of the mounting flange castings on my engine block not drilled and tapped, but some of the flanges were in the wrong place. So I ended up building my own mounting bracket for the alternator and the AC compressor. |
|
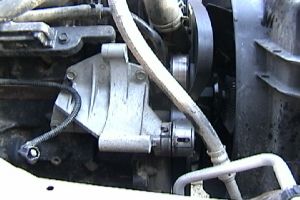
The most important part is making sure that the pulleys; alternator, idle and air compressor are square with the belt and even with the other pulleys. |
|
|
|
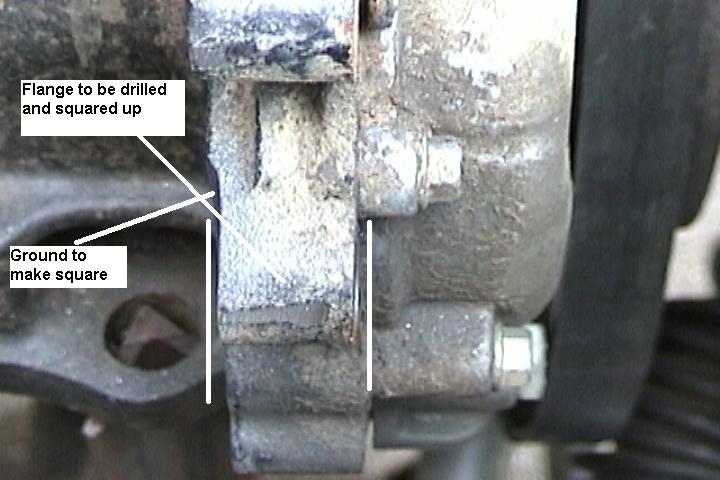
The backside of the flange casting is not parallel to the front surface, which needs to be rectified. I used a 4 1/2 inch grinder and carefully ground the backside of the flange. Next mounted the alternator using washers as spacers |
|
|
|
||||||||||||||||||||
|
. By varying the number of washers I could adjust the position of the alternator pulley. Laying a straight edge across the front of the alternator pulley you can check to see if it is square to the belt and other pulleys. Once I got the proper number of washers figured out for the two spacers. I put a bolt through the group of washers that I had used for the front spacer and tightened the bolt. Then welded the washers together, again using the grinder, I rounded out the spacer. For the rear spacer I removed two of the washers and cut a piece of 3/8 inch pipe to length. Since the pipe has a thin wall and does not have much surface contact I welded a washer onto each end of the pipe (the two washers I removed).
|
|
Things to remember; The most important and hardest part, is making sure that the pulleys for the, alternator, idle and air compressor are square with the belt and even with the other pulleys. When welding, metal shrinks, so measuring, drilling, cutting the entire mounting system and then welding will not work. As you weld the alignment shifts. You need to assemble, weld in an order to reduce warping from affecting your alignment.
|
|
|
||||||||||||||||||||||||||||||||
|
|
||||||||||||||||||||||||||
|
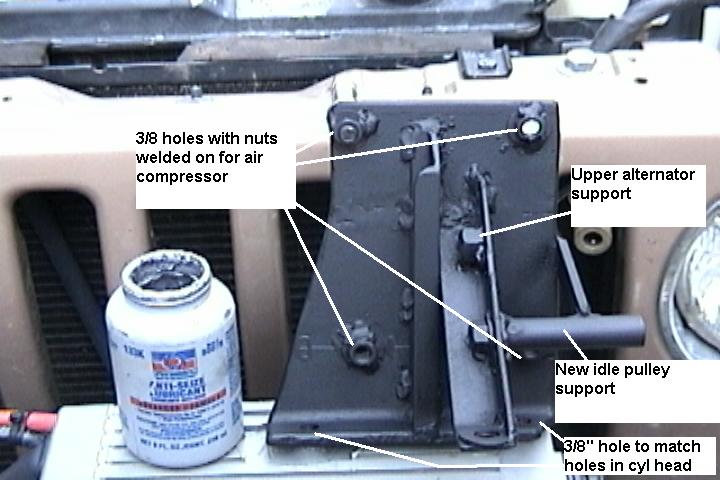
Bolting the air compressor plate in place and remount the alternator (check to make sure the Alt. pulley is square). Now we are ready to make a brace that goes from the lower block to the compressor plate and supports the upper Alt. mounting hole. I used an 11/2 X 11/2 angle iron, cut one end so one side can be bent flush with the lower engine mounting flange and drill a 3/8 hole. Holding it in place so the Alt. can be mounted to it, mark it to be cut at an angle to match the bottom of the compressor plate. After cutting, bolt it to the lower block, locate where to put the ½ hole for the upper Alt. mount and drill. Weld a ½ X 20 nut onto the angle iron. Bolt it to the lower block and Alt. check to make sure the pulley is still square with the other pulleys. Tack weld the brace to the compressor plate. Remove the plate and brace unit and weld. Reinstall the Comp. plate and Alt. check the Alt. pulley for squareness.
|
|
|
|
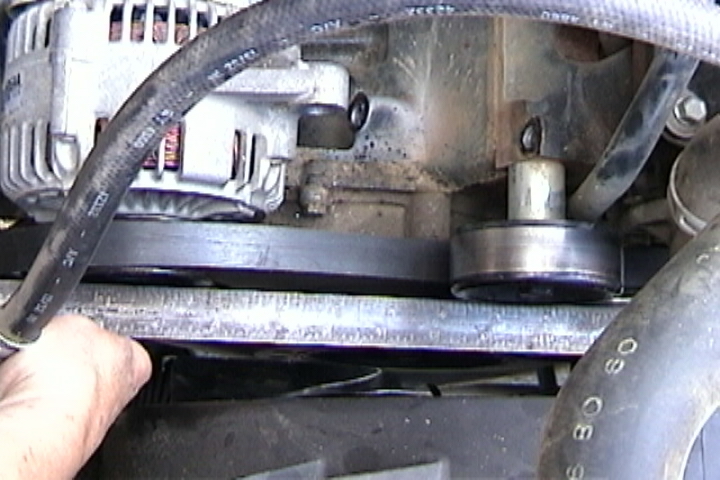
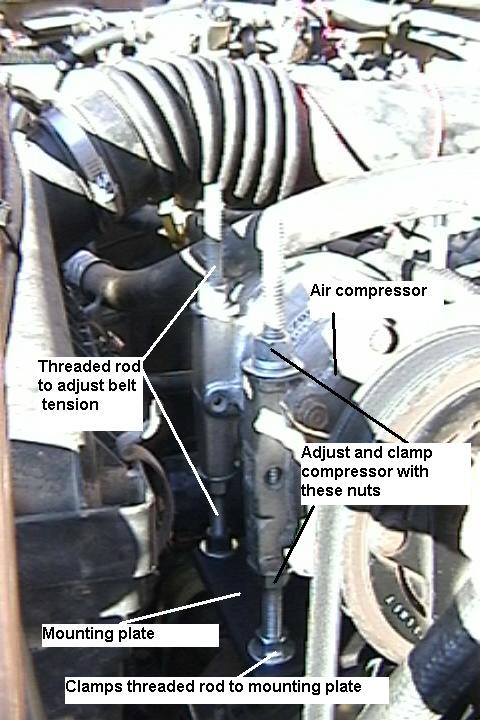
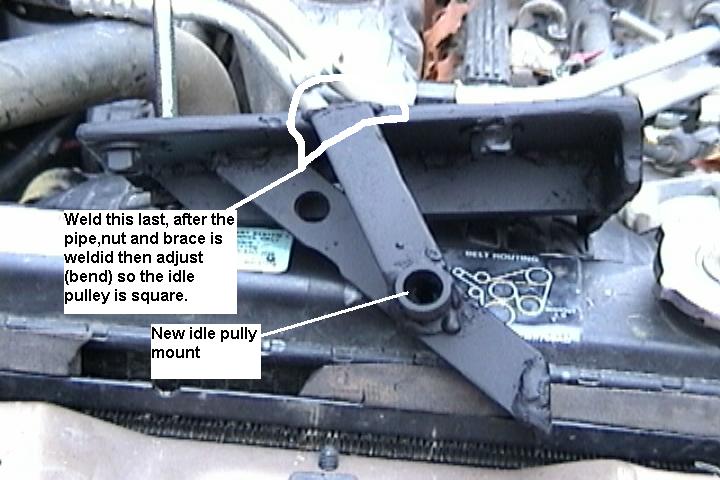
Remount the mounting plate, alternator, air compressor (I found the easiest way is to mount the altinater then the compressor mounting plate, then the air compressor. By threading the rods through the compressor, add the nuts and washers put the compressor on the mounting plate and thread the rods into the captive nuts). Now we need to locate where you want a new idle pulley to go I located it so that it could also be mounted on the diagonal brace that goes from the engine block to the upper alternator mount to the compressor plate. I again made up the spacer using a 3/8 inch pipe and washer I welded the pipe to the brace and a nut. It took a piece of scrap metal, welded one end to the spacer. I installed the new idle pulley on the spacer and checked that it was parallel with the other pulley's I then welded it to the edge of the compressor plate. All done, thats all there is to it. Now with a tape measure run it along the path that the new belt will take. Go to your auto parts store and my three or four belts around what you think is going to be the correct length. Repeat the trip to the auto parts store until the proper belt is found. I found for my installation 107.5 in. belt worked fine. I ran the high-pressure line to my ARB compressor, the electric clutch gets activated when the ARB compressor comes on. I will run a 5/8-inch hose from the engine side of the air filter box to the inlet of the air compressor. I can now fill up my 33 X 12 1/2 by 15-inch tire from 11 P.S.I to 35 P.S.I in 59 seconds! Since I have the ARB pump also come on when the belt driven pump comes on, I know the ARB pump will not become stale from lack of use.
|
|
Finished mounting plate from bottom |
||||||||||||||||
|
Finished mounting plate from front |
||||||||||||||||
 |
||||||||||||||||
 |
||||||||||||||||
|
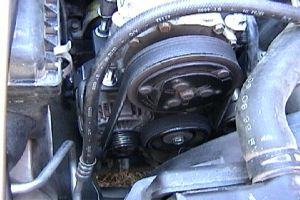
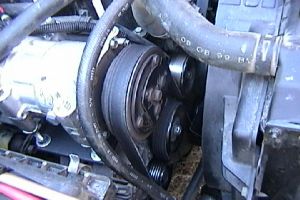
Finished |
||||||||||||||||
 |
||||||||||||||||
 |
||||||||||||||||
|
Other articles |
||||||||||||||||
|
New belt is K061075 K means serpintine belt06 is 6 ribs1075 is 107.5 inches long
|
||||||||||||||||
|
|
|
|
|
|
[Odyssey] [Day 8-14] [Day 15 -21] [Day 22 - 28] [Day 29 - 35] [Day 36 - 42] [Day 43 - 49] |
|
[the shaft] [airing down] [Salsa] [Air Compressor] [Cooking Meatloaf] [Articles in Low-Range] |
|
[Trails] |
|
[Choke Cherry] [Holy Cross] [Death Valley] [Chili Challenge] [Caballo Mts] [Gila NF Trip] [Titus Canyon] |
|
|
|
||||||||||||||||||||